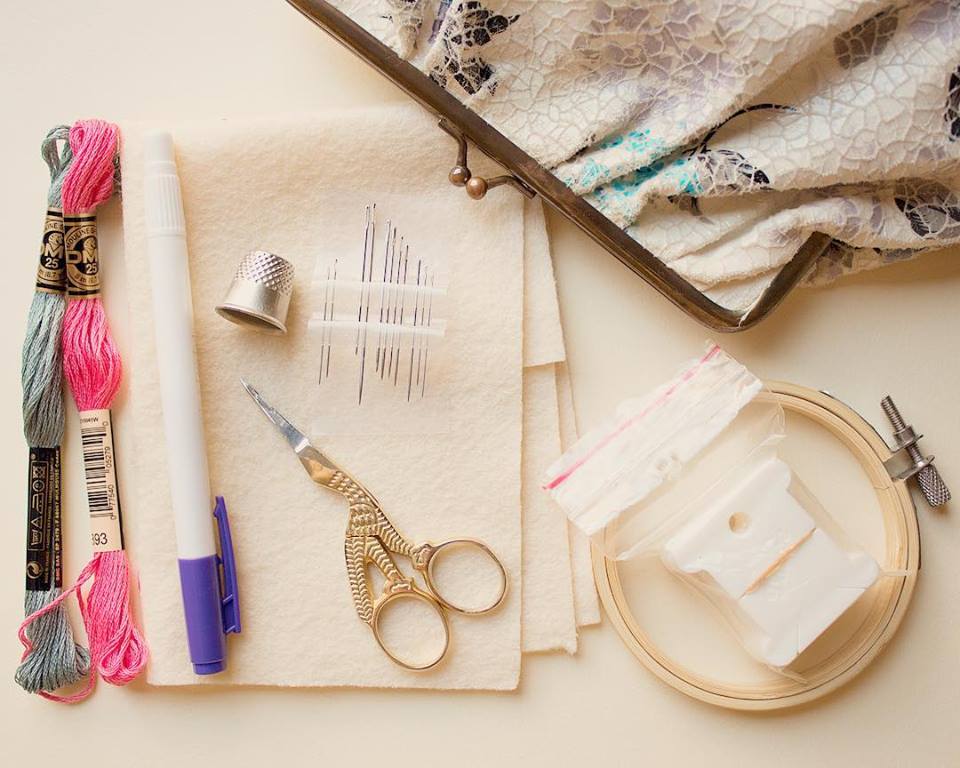
~Welcome to my new series of tutorials! I dedcided to name it 'Stitch With Me' becase I'm not an expert at embroidery so I thought it would be unqie way of teaching embroidery where we are going through the learning process together!
The series will focus on a new topic once a month and will be shared through blogs posts and videos on my Youtube channel. So whether you're a visual or literary learner I've got you've covered!
***Disclaimer: I am not sponsored by any of the brands or companies. Everything is my honest opinion :)
Essential Supplies:
Hoops:
There are so many different kinds of hoops available to get you started! The traditional circular hoop ranges from 3 to 14-inches in diameter. The hoop should have some fabric hanging out the sides so that you can pull it tight enough to be taut but not too tight that it buckles. You can also find specialty hoops that are different shapes and some of them come with attathments to make it into jewllery.
I generally use the Loops and Threads brand from Michaels because they are made out of bamboo which is more sustainable. They are also made out of a single piece of wood and are therefroe more sturdy. Be sure to check the hoop before you buy it though. Sometimes they have issues such as gaps between the two rings of the hoop. You want to make sure that they sit right up against eachother. Wooden hoops might also might need extra padding, especially the cheaper ones. To add extra padding you can wrap some fabric or tape around the inner ring. Also these cheaper options are more prone to breaking!
Plastic hoops are great for keeping the fabric nice and tight and are less prone to breaking but can be a little bit harder to put on the fabric as they snap into place rather than slowly tighten. They also aren't as enviromentally friendly as hoops made out of bamboo.
Fabric:
I really like using the Aida cloth by Loops and Threads from Michaels. I find it really soft and flexible to work with. Other fabrics that are similar to this are Muslin, Cotton, and Linen. They all are weaved looser and come in different counts based on how many threads are in one square inch. The count of your fabric will also dictate what size of needle you'll need. But you can pretty much embroider on any kind of fabric or textile. My friend Karen has even embroidered beautiful flowers on to tissues, so where ever there's a will, there's a way!
Floss/Thread:
I love to use the DMC floss which is a company that started in France in 1746 and they've been providing light fast and high quality yarna nd thread ever since. The selection in colours is amazing with almost 500 different colours in their regular 6 strand embroidery floss line. But be mindful that some craft stroes might not carry the smae colours as other or may have a smaller selection. They also have so many different kinds of threads availble like glow in the dark, shimmery, colour changing gradients and more! I have tried using cheaper embroidery floss in the past but find them to be a bit muted, not as shiny or smooth and they get tangled a lot easier.
Needle:
There are many different kinds of needles for different kinds of crafting. To start out you are going to want the embroidery needles which have slightly larger eyes (hole where the thread goes) and sharp points. The Loops and Threads brand sells a variety pack of embroidery needles that come in slightly different lengths and sizes of eyes so I would suggest to get this when your just starting out to get a feel for the size of needle you like to work with. I find that I gravitate towards using smaller needles for smaller and more detailed projects like pins and larger needles when I'm working on larger pieces like an embroidered picture.
Scissors:
I swear those cute little golden scissors aren't just for show! The embroidery scissors are great for very detailed and tricky work and are also very sharp all the way to the tip. I also have regualr sized fabric scissors that are helpful when cutting larger areas. But remeber to only use these scissors for textile materials. If they are used for other things like paper, plastic tags, etc. they can be damaged over time.
Drawing Instrument:
There are a couple of different tools you can use to draw your design onto your fabric. I use to just use a pencil but it's pretty hard to get the graphite out of the fabric witht the erase, and it doesn't really completeyly fade on its own. My favourite is the erasable marker from michaels. It draws in purple and has a clear marker on the other end that will erase the purple marks within seconds! Also, if you don't manually erase it, it will fade on its own. But when I working with darker coloured fabrics I use my dressmaker's pencil which is white. It's not the greatest though because I have to keep sharpening it to get a fine point and it ikind of hard to rub off.
Bonus Supplies:
Ruler or Measuring Tape:
I think this one is pretty self explainitory, so I won't go into too much detail. A ruler or measuring tape can be very helpful when planning out your design. If you're making a very size specific piece, like a patch for the pocket of your jean jacket, than a ruler or meauring tape will help to ensure that your patch fits nicely on top of the pocket.
Thimble:
Be sure to try on different sizes of thimbles before hand so that they are not too loose or too tight. Some people might find thimbles annoying to have on while working while others might find it comfortable to work with. Either way it definitely provide some piece of mind for your fingers!
Bobin Cards:
Sometimes this tool can mean the different of a clean clean set up and a messy set up for embroidery! These cards are great for organzing and keeping your extra/leftover thread safe and accessible. You just wrap the thread around the card and label the colour code on top. Some packs even come with a keychain ring so that you can have them all together. That way when you need to use that colour again you know exactly where to find it. It always seems like a pain at the time to do all this, but trust me, it is worth it in the long run!
Threader:
Some people have a hard time seeing very small and closeup and find it fustrating to get the thread through thte eye of the needle. But the threader makes it 100 times eaiser! I do prefer the DMC brand one. In the past the cheaper versions would snap pretty easily and the last thing you want when your fustrated with your needle and thread is a broken threader!
Glue:
I usually only use glue when I am making patches/pins/hair barettes. When I embroidered around the edge of the fabric it can seem impossible when it's fraying everywhere. Th eclue helps to seal the edge giving my stitching a much cleaner look. Strong glue is also great when applying the metal backings. I would feel terrible if someone's pin broke apart which is why I sew and glue it into place everytime for extra security :)
Clips:
Clips can always be helpful for a variety of reason. I mainly use clips while embroidering on larger pieces. They are great for keeping the extra fabric I'm not wokring on out of the way. They can also be helpful for tracing/transferring designs onto your fabric. For example you could clip your fabric onto of your design, hold it up to the window and tarce away without any shifting of the design.
Good Lighting:
Although working in dim lighting doesn't really hurt your vision, it will tire your eyes out. So please remember to be kind to your eyes and turn the lights on :) Try experimenting with lights that are more cool or warm and see what suits you best. I personally really love natural lighting on a cloudy day. I have very light blue eyes so sunny days are already pretty harsh for me! But since I live in Canada where we don't get a lto fo sunlight for eight months a year, then I prefer a slightly warmer light like a lamp with an incandescnet lightbulb.
Hoop Stand:
This is definetly one of my absolute favourite bonus tools and I highly recommend purchasing a hoop stand if you will be embroideing a lot. IYour posture is extremely important for your healtha nd well being and I find that it's pretty easy to get hunched over in a bad position while embroidering. The hoop stand allows the embroidery piece to meet you at the right level instead of you leaning over to see your piece. They are also great for your hands because you don't need to hold onto your hoop as hard. There are multiple points of on the stand where you can adjust the angle and the clasp at the top that holds the hoop can even spin around allowing easy acess to the back of the embroidery piece.
Iron:
sometimes ripples in your fabric are inevitable but your frined the iron is here to save the day. Although it might not be able to get flattion every ripple it will provide a clean finished look to your creation. You will also need an iron if you are using the heat off stabilizer on an iron on transfer.
Magnify Glass:
Embroidery is very detailed work and can be pretty tiring on your eyes. So you might want to opt-in to using a magnify glass to add more ease to your work flow. There are lots of different kinds availbe from your standard handheld ones to handband magnify glasses.
Thread Conditioner:
I haven't personally used this tool before but the reviews I heard are great! Thread conditioner is a wax like substance that you can coat your embroidery floss in before stiching to make it smooth and less fuzzy. Also, because it becomes so smooth it doesn't tangle on itself as much as it normally would otherwise. I'm not sure if this product is sold at my Michaels but I am very keen to try it out and will probably do a review on it to share with you!
Stabilizer:
Stabilizers are helpful to keep your fabric flat and provides a firm surface to work on. There are 4 different kinds of stabilizers based on on they are removed. They are tear out, cut off, heat off and water off. Be sure to test the threads before hand when using the the wateroff one to make sure that the dye from the thread doesn't bleed out!
Where I Get My Supplies from:
- Michaels
- Fabricland
- Len's Mill
- Amazon
- Second Hand stores, garage sales and friends/family!
Thank You For Checking Out My First Tutorial!
Please leave a comment below if you have any:
-Reccommended embroidery/textile stores in the Toronto area!
-Question about embroidery supplies
-Ideas for future 'Stitch With Me Tutorial' topics
-Other questions!

